Why Crafting Your Own Decorations is So Rewarding
Let’s be honest—there’s something truly special about filling your home with decorations you’ve made yourself. It’s not just about saving money; it’s about infusing your space with your personality and creativity. Whether it’s a hand-painted vase or a cosy throw pillow, DIY decor adds a unique touch that mass-produced items just can’t match. Plus, the satisfaction of saying, “I made that!” is pretty hard to beat.
That’s why we’ve put together this guide—to inspire you to start crafting your own home decorations. Whether you’re a seasoned crafter or just starting out, these ideas and tips will help you create a home that’s truly your own. Ready to get creative?
Essential Tools and Materials for DIY Home Decor
Before you dive into your first project, let’s talk about the basics. Having the right tools and materials on hand can make all the difference in how smoothly your DIY projects go.
Basic Crafting Tools
- Scissors and Craft Knives: Sharp scissors and a reliable craft knife are essentials for cutting fabric, paper, and other materials cleanly and accurately.
- Hot Glue Gun and Glue Sticks: A hot glue gun is a DIYer’s best friend. It’s perfect for quick fixes and holding materials together securely.
- Measuring Tape and Ruler: Accurate measurements are key to ensuring your projects turn out just right. A measuring tape and a sturdy ruler will help you avoid any wonky edges.
- Paint Brushes and Rollers: Whether you’re painting a canvas or refreshing an old piece of furniture, a good set of paint brushes and rollers will make the job easier and more enjoyable.
Common Materials
- Paints (Acrylic, Chalk, Spray): Different paints serve different purposes. Acrylics are versatile for a range of projects, chalk paint is great for that shabby chic look, and spray paint is perfect for a quick, even finish.
- Fabrics (Cotton, Burlap, Felt): Fabric can be used in countless ways, from creating cushions to wall hangings. Choose materials that suit your style and project.
- Wood and Wooden Embellishments: Whether you’re building something from scratch or adding a decorative touch, wood is a fantastic material to work with.
- Paper and Cardstock: Ideal for making everything from wall art to custom cards, having a variety of paper on hand is a must for any crafter.
Optional Extras
- Stencils and Stamps: These are great for adding patterns and designs to your projects without needing a steady hand.
- Beads, Buttons, and Sequins: Small embellishments like these can add a bit of sparkle or texture to your decor.
- Decorative Tape and Ribbons: Perfect for adding a finishing touch or creating patterns, these are versatile materials you’ll find yourself reaching for often.
- Repurposed Items (Jars, Pallets, Old Frames): One person’s trash is another’s treasure. Repurposing old items not only saves money but also adds a unique character to your decor.
DIY Home Decor Project Ideas
Now that you’ve got your tools and materials ready, let’s dive into some project ideas. These are all beginner-friendly but can be customised to suit your style and skill level.
Wall Art
- Canvas Painting: Even if you’re not a professional artist, abstract designs or simple patterns can make for stunning wall art. Use acrylics to create a piece that matches your room’s colour scheme.
- Framed Fabric or Wallpaper: Have a piece of fabric or wallpaper you love? Frame it as wall art. It’s a simple yet effective way to add texture and colour to your space.
- DIY Wall Hangings (Macrame, Yarn): Wall hangings are a hot trend right now, and they’re surprisingly easy to make. Start with a basic macrame pattern or a simple yarn design to create a boho-inspired piece.
Decorative Accents
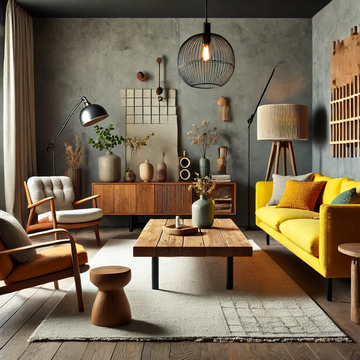
- Hand-Painted Vases and Jars: Transform plain glass vases or jars with a bit of paint. Whether you go for a sleek, modern look or something more rustic, the results can be stunning.
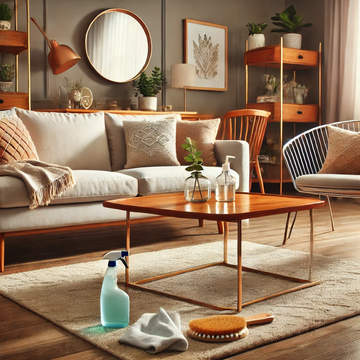
- Decorative Throw Pillows: Customise your cushions with fabric paint, stencils, or even by sewing on buttons and patches. It’s a quick way to refresh your living room or bedroom.
- Customised Candles: Add some flair to plain candles by wrapping them in decorative paper, twine, or even painting on a design. They make great centrepieces or gifts.
Upcycled and Repurposed Decor
- Pallet Furniture (Shelves, Coffee Tables): Wooden pallets can be transformed into anything from rustic shelves to chic coffee tables. It’s an eco-friendly and budget-conscious way to furnish your home.
- Mason Jar Organisers: Mason jars aren’t just for canning—they make great organisers for everything from kitchen utensils to craft supplies. Paint them, label them, and mount them on a board for a stylish, functional storage solution.
- Vintage Frame Mirrors: Got an old frame lying around? Turn it into a statement mirror. A quick coat of paint and a mirror insert are all you need to create a chic, vintage-inspired piece.
Seasonal and Holiday Decor
- Handmade Wreaths: Whether it’s for Christmas, Easter, or just because, a handmade wreath can add a festive touch to your front door. Use seasonal flowers, ribbons, or even repurposed ornaments.
- Festive Garlands and Bunting: Garlands are perfect for adding a touch of festivity to any room. Whether you’re using fabric, paper, or even pinecones, they’re easy to make and look fantastic.
- DIY Ornaments and Centrepieces: Get into the holiday spirit by crafting your own ornaments or table centrepieces. Use materials like wood slices, glitter, and candles to create something special.
Step-by-Step Guide to a Sample DIY Project
Let’s walk through a simple project together—creating a decorative throw pillow.
Project: Creating a Decorative Throw Pillow
- Gather Materials: You’ll need fabric (enough for the front and back of the pillow), a cushion insert, fabric glue or a sewing kit, and any decorations like buttons or stencils.
- Measure and Cut Fabric: Measure your cushion insert and add a couple of centimetres on each side for seams. Cut your fabric accordingly.
- Sew or Glue Edges: Place the fabric pieces together, right sides facing, and sew or glue along three edges, leaving one side open.
- Add Decorative Elements (Buttons, Stencils): Before closing up the final side, add your decorative touches. This could be stencilling a design, sewing on buttons, or adding a fabric appliqué.
- Stuff and Close the Pillow: Insert the cushion and then sew or glue the final edge closed. Give it a fluff, and you’re done!
Tips for Success
- Choosing the Right Fabric: Make sure the fabric is durable and matches your room’s decor. Consider mixing patterns for a more eclectic look.
- Keeping Edges Neat: If you’re sewing, use pins to keep the fabric in place while you work. If you’re using glue, make sure it’s fabric glue for a strong bond.
- Experimenting with Different Designs: Don’t be afraid to try something new. Mix and match different fabrics, or add a touch of embroidery for a unique look.
Personalising Your Home Decor
Part of the fun of DIY is making things that reflect your personal style. Here’s how to ensure your creations are uniquely yours.
Choosing a Colour Palette
When crafting decor, think about the colours in your home. Choose a palette that complements your existing decor or adds a pop of contrast. It’s amazing how a cohesive colour scheme can pull a room together.
Incorporating Personal Touches
Add a personal touch to your projects by including family photos, monograms, or meaningful symbols. For example, you could create a gallery wall with framed family photos interspersed with DIY artwork or quotes.
Mixing Styles and Textures
Don’t be afraid to blend different styles and textures in your decor. A rustic wooden sign can look stunning next to a sleek, modern lamp. The key is to find a balance that feels right for you and your space.
Tips for Getting Started with DIY Home Decor
Starting a new DIY project can feel daunting, but these tips will help you ease into the process and enjoy it along the way.
Start Small
If you’re new to DIY, start with a small project. Something like a hand-painted vase or a simple wall hanging can be a great way to build confidence and get a feel for the materials you’re working with.
Stay Organised
Keeping your workspace tidy can make the crafting process much smoother. Set up a dedicated area for your materials, and make sure everything has its place. It’ll save you time and frustration later on.
Be Patient and Enjoy the Process
Crafting is as much about the process as it is about the finished product. Take your time, experiment, and don’t worry if things don’t turn out perfectly. Every mistake is just an opportunity to learn something new.
Common Challenges and How to Overcome Them
Even the most experienced crafters face challenges. Here’s how to tackle some of the most common ones.
Dealing with Mistakes
Mistakes happen, but they don’t have to ruin your project. If something goes wrong, try to fix it or think of a way to repurpose it. Sometimes the best ideas come from happy accidents.
Finding Inspiration
If you’re feeling stuck, try browsing Pinterest, watching DIY tutorials on YouTube, or visiting local craft fairs. Inspiration is everywhere—you just need to know where to look.
Balancing Time and Projects
DIY projects can be time-consuming, so it’s important to manage your time wisely. Break larger projects into smaller tasks and set realistic deadlines for yourself. This way, you’ll stay motivated and avoid burnout.
Ready to Start Crafting?
So, there you have it—a guide to creating your own DIY home decor. Whether you’re looking to refresh your living room with some new cushions or make a statement with a custom piece of wall art, the possibilities are endless. Now, it’s time to gather your materials, roll up your sleeves, and let your creativity run wild. Your home will be all the better for it!